Wee-Things: Hello LED!
Hello LED!
In this tutorial we will use our NodeMCU board and the node-esp CLI tool to control an LED.
We will write a very simple program to control an LED, and learn how to control the led using the CLI.
We will ned an LED, two female to female cables, and a NodeMCU board.
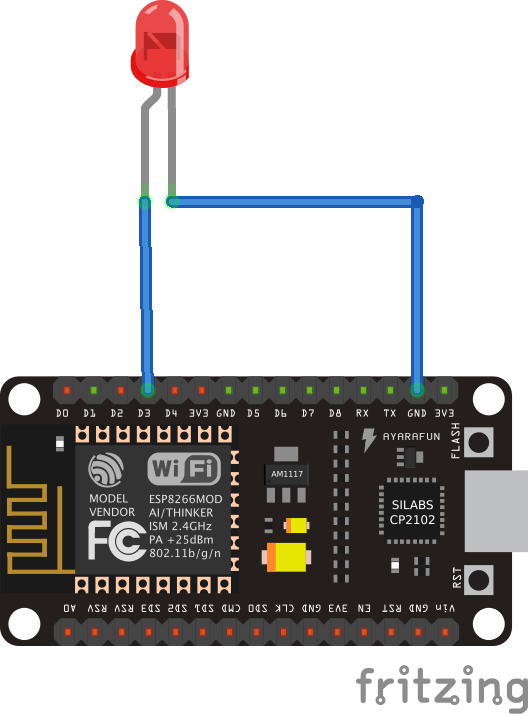
Wiring the LED
Previously we learned how to control the on-board LEDs. In this tutorial we will use an external LED. The wiring is rather simple.
Source Code
The source code for this tutorial is rather simple. We declare a global PIN variable to hold our the pin to which we connected the LED's anode. We then use the gpio module to set the mode of PIN as OUTPUT so we can power up the LED.
Lastly, we declare two global functions, on and off that use the gpio module to control the LED.
-- We will use pin D3
PIN=3

-- Set gpio pin as OUTPUT
gpio.mode(PIN, gpio.OUTPUT)

function on()
    gpio.write(PIN, gpio.HIGH)
end

function off()
    gpio.write(PIN, gpio.LOW)
end
Controlling NodeMCU from the CLI
The main idea here is that we can access the global memory space from the CLI and execute commands referencing global values.
We need to load the boot.lua file into the board:
$ esp file write boot.lua
We then need to load it in memory by executing the file:
$ esp file execute boot.lua
We can now access the functions on and off from the CLI. To turn the LED on:
$ esp run "on()"
And to turn the LED off:
$ esp run "off()"
If it's not working, double check that your LED is wired properly, the cathode- short pin- to any GND pin, and the anode- long pin- to pin D3.